
")
A patient comes to your office for crown or veneer preparations of multiple teeth. You have spent many hours perfecting the preparations. You’ve looked at them at every possible angle, and your neck/back pain is starting to tell you that the preperations are perfect. You’ve packed cord, and taken the final impression (probably more than once). You’re tired, the patient is tired, and you’re assistant is nudging you that you’re running behind schedule.
Time for the temporary restorations. What’s the last thing you want to see? Voids, bubbles, your matrix not seating properly, large overhangs, flimsy margins…we could go on. Unfortunately, this is the reality with the traditional way of making temporaries, whether you are packing resin or acrylic into the matrix you have ready.
There is an alternative: direct injectable temporary restorations. There are no seating errors, no bubbles or voids, margins are near perfect as the material flows under pressure, and there is minimal excess to trim. This method also requires little modification from the traditional way making temporaries.
Here are the steps for completing direct injectable temporary restorations:
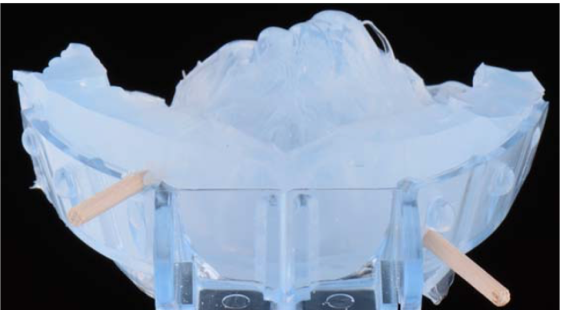
- Fabricate a matrix using transparent Polyvinyl Siloxane (PVS) material. This is key as it allows you to visualize the injection process of the temporary materials. The matrix can be made directly from the pre-prepared teeth or indirectly on a wax-up model. A clear tray should also be used, large enough to allow about 2mm of Polivinyl Siloxane thickness.
- The matrix should extend at least one tooth on either side of the preparation, to create a seal for the injectable temporary material.
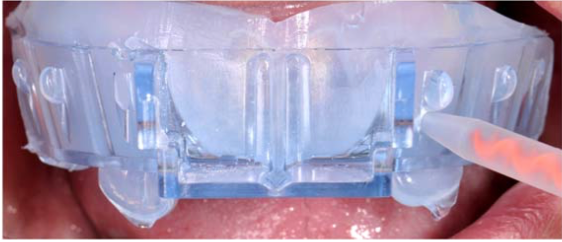
- Once the matrix is made, two holes should be created in the clear tray and through the PVS matrix. This will be used for injection and venting. The injection hole should be on the incisal edge and the venting hole should be near the cervical area (to allow escape of entrapped air). Both holes should be around 1.5 mm in diameter, created with an acrylic bur.
- Now we are ready to temporize. The patient should be lying down, and the tray with the matrix should be fully seated. Full seating can be ensured due to the transparency of the tray and the matrix. Bis-acrylic material (Luxatemp Automix Solar) can be used. This material can even be warmed in hot water for 5 minutes before use to decrease viscosity if working on multiple prepared teeth, to ensure flow of the material to all teeth.
- The tray should be held firmly and the temporary material injected with its mixing tip. The exit hole can be covered with a finger to increase the pressure inside the tray, to further prevent voids and increase marginal adaptation.
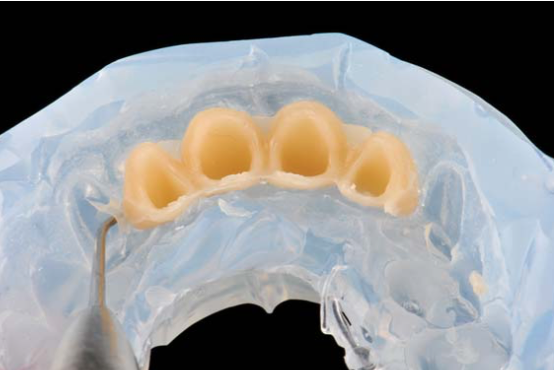
- About 30 seconds prior to full polymerization, the tray can be removed with the temporary restorations in the tray. Now the temporary restorations can be trimmed, polished and cemented.

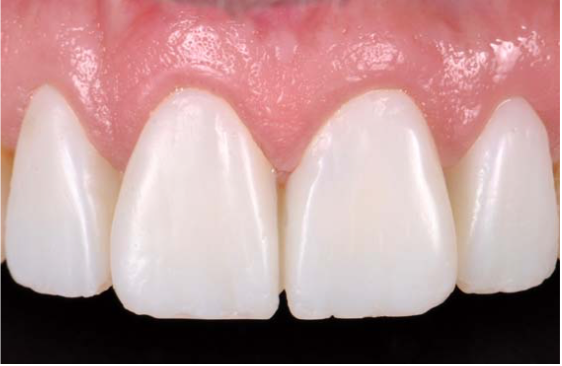
This is very easy modification to our traditional temporary restoration protocol. However it can make our lives much easier, with minimal adjustments necessary in the final product. The best areas to use this method is in veneer or crown preparation of anterior teeth, as you can easily visualize the process and use direct light to aid in polymerization.
You, your patient and your assistant will be much happier (and go home earlier).
This case was completed and reported by Alvaro Blasi, DDS, CDT, Talal Alnassar, BDS, MDS, CD, Gerard Chiche, DDS.